Bonjour à tous,
Petit tutoriel mise en place pour rajeunir nos petites golfs !
Ce tuto écrit a été testé, réalisé et fonctionnel par mes soins et celui de Romuald (on le remercie car il a cherché longtemps et testé 2,3 blocs abs avant de trouver le bon mais a pu aider tout le monde à pouvoir réaliser ce swap !) et on remercie également KaiserZeus pour le codage et les aides précieuses qui ont pu aboutir au projet !
Ce tuto sera divisé en 3 parties :1. Recherche + références compatibles
2. Changement de la partie électrique abs avant = Juin 2006 et/ou pontage de fil après 2006 sans esp
3. Montage du compteur + adaptateur
! Avant toute chose, merci de dabord lire entièrement ce tutoriel une fois avant deffectuer les manipulations afin de savoir ceux que vous allez acheter/modifier, de plus nous ne pouvons être responsables des causes et dommages effectuées lors de votre montage !- Sur les Golfs 5 possédant l'ASR de 2003 jusqu'à Juin 2006 le changement du bloc ABS (partie electrique) est nécessaire
- Sur les Golfs 5 possédant lESP avant et jusquà 2006 il y a seulement le pontage de fil à effectuer
- Sur les Golfs 5 possédant l'ESP après 2006 aucune modification à faire sur le bloc abs (Plug&Play)
1. Recherche + références :
COMPTEURS :
Tout dabord nous allons commencer par les références possibles de compteur swapables sur nos golf 5 :
Exemple : 1k8 920 885 D
1kA BBB CDE h
A = Modèle : B = Version du can Bus C= graduation D= affichage odb E= Variante
1k8 = Compteur scirocco 920 8 = km/h 6 = petit odb 5 = Diesel
3C8 = Compteur Passat 9= mph 7 = grand odb 4= Essence
1Q0 = Compteur EOS 8 = grand odb couleur 3= Essence
1t0 = Compteur Tiguan
2k0 = Compteur Caddy
(1k0 = Compteur Golf)
Vous lavez deviné, cest un compteur de scirocco avec canbus 920 en km/h et un grand odb couleur en diesel
Certains compteurs par exemple Tiguan ou caddy nont pas la même forme au niveau de la vitre, il faut bien comparer la vitre dun scirocco / golf 5 avec celle-ci, car ce format correspond généralement pour Golf 6 mais il y a juste à changer ou récuperer le contour de votre compteur et c'est bon
Pour généraliser et la faire courte sur internet on trouvera :
1k8 920 87x A/B/C/D de 0 jusquà 5 ce sont des compteurs NOIR & BLANC MFA
1k8 920 88x A/B/C/D de 0 jusquà 5 ce sont des compteurs COULEUR MFA
1k8 920 885 ou 886 A/B/C/D ce sont des compteur COULEUR 3D MFA
À vous de trouver la bonne graduation sur les photos et si vous le souhaiter en couleur !
Compteur N&B SANS MFA :
Ce sont des compteurs sans menu, sans aucune options, identique au petit obd rouge de golf 5 avec seulement la vitesse instantanée en plus et également une boussole. (Perso je ne suis pas fan car esthétiquement pas jolie et le rapport codage adaptation nest pas intéressant autant rester
Compteur N&B Avec MFA : 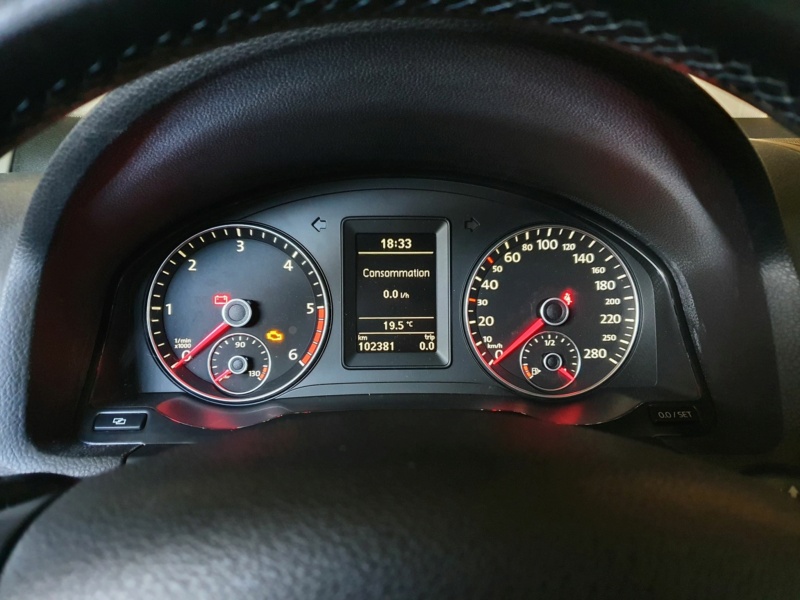
Un compteur noir et blanc scirocco coute entre 120 et 150 en moyenne, cela varie entre les vendeurs sur eBay, au Royaume Uni par exemple le prix est divisé par deux mais attention à bien récupérer les fonds de compteur en km/h et diesel dans certains cas
Compteur COULEUR avec MFA : 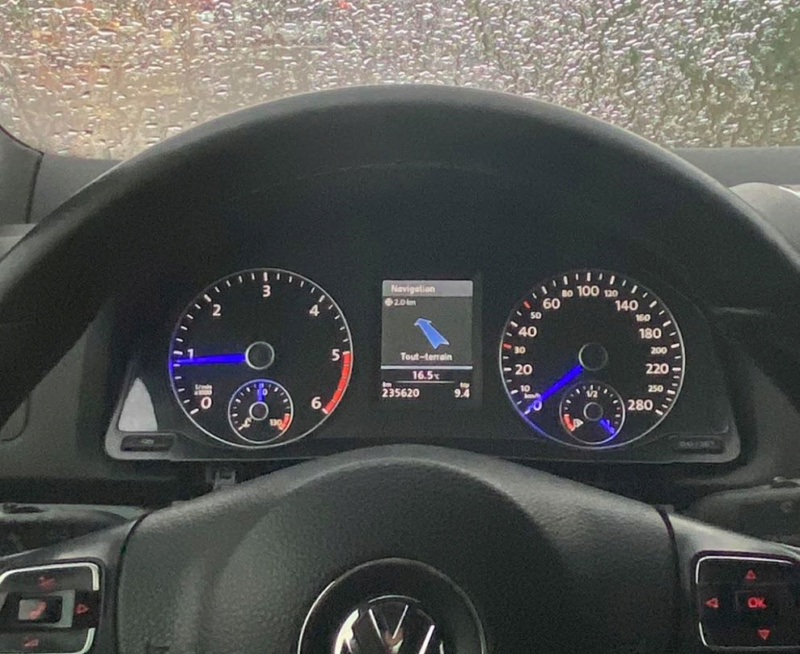
Exactement les mêmes fonctionnalités que le compteur noir et blanc mais il est en couleur. Beaucoup plus jolie, mais beaucoup plus chère car très rechercher (loffre et la demande) cela varie entre 250 et 400 (oui vous avez bien lu), mais on peut trouver des perles, à savoir dans des casses autos sur eBay, les vendeurs ne savent pas ce quils vendent car la voiture est HS donc pas de test possible, juste la référence et avec celle-ci des fois on peut trouver comme moi à 74 livré.
Compteur COULEUR 3D avec MFA : 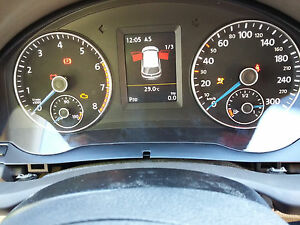
Les mêmes fonctionnalités que le compteur Couleur mais laffichage est en 3D (logo du véhicule, indication GPS) très très recherché, ma dernière recherche frôlait les 500/600
Compteur MFA : Un compteur MFA est généralement le plus recherché car possède beaucoup doptions contrairement à un compteur classique (comme le petit odb rouge de nos golfs)
Quest-ce que lodb mfa ? : Permet de visualiser la piste audio en cours, téléphoner, afficher lindication GPS, accès à la radio, température dhuile et surtout laffichage dynamique des km/h depuis le compteur avec également des options activables et désactivables sans forcément avoir besoin de passer par le vagcom (exemple : durée leaving/coming home..)
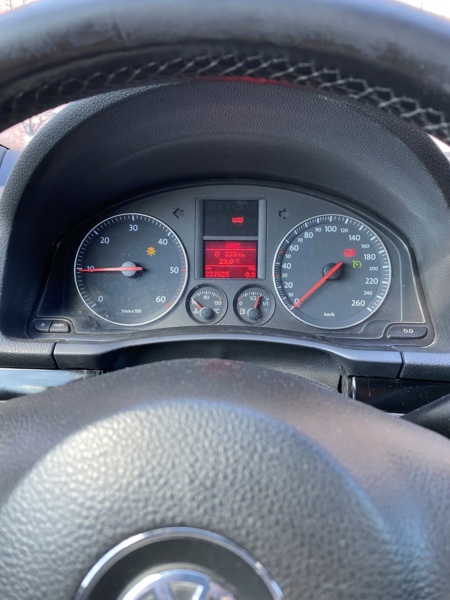
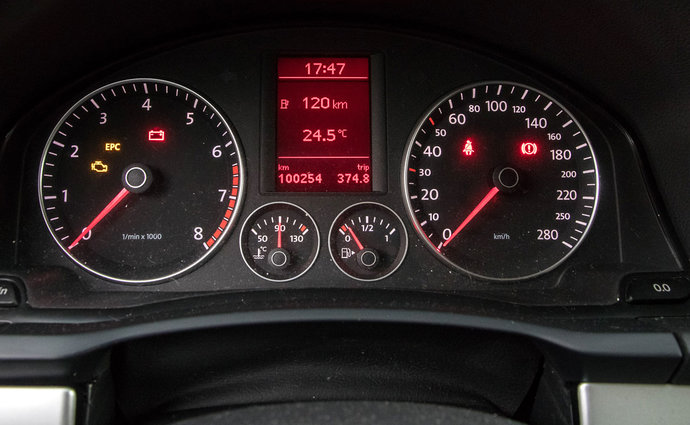
Distinction des compteurs scirocco : 1 référence = 3 modèles (oui pas très malin le référencement) : 1. Le premier style du compteur scirocco (2004 2009) est lodb rouge, à savoir le même que le notre tout simplement sauf les contours sont argentés sur laiguille jauge de gasoil ainsi que la jauge du liquide de refroidissement, pas très intéressant pour un swap car il est identique que sur Golf 5
Il existe sans MFA avec MFA petit et grand obd
Sur cette photo cest un MFA avec grand OBD
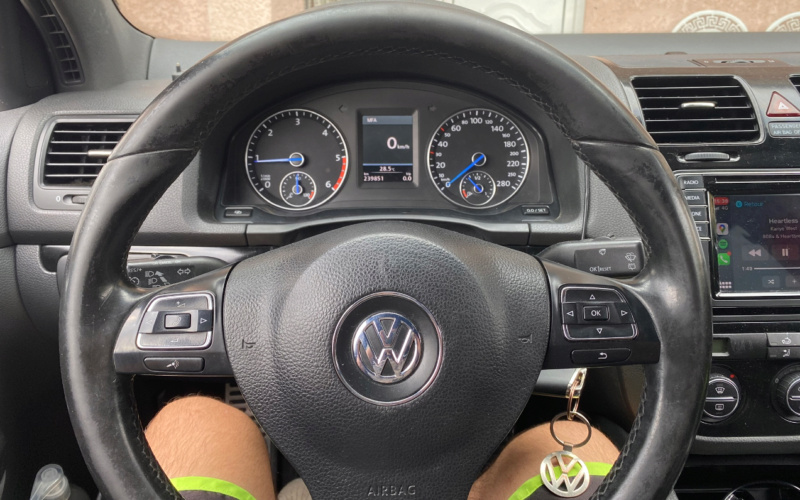
2. Le second style du compteur scirocco (2009 2013) est celui avec lécran centré entre le compte tour et les km/h et la jauge de carburant se situe dans le fond de km/h en bas et la même chose pour la jauge de LDR pour le compte tour comme les Golf 6 mais sans les reliefs.
Il existe sans MFA avec MFA et MFA Color et Color 3D
Ce compteur est un MFA Color.
 https://www.youtube.com/watch?v=1_NlWpnrNA8
3. Le troisième style de compteur scirocco (2013- 2016) est celui de la facelift, très semblable à 99% de celui de la golf 7, avec les mêmes fonctions, le même style que le compteur précédent sauf quil possède des reliefs autour des fonds (comme la Golf 6) et possède des options de lépoque où il a été répandu (ex : parkassist / line assist voire même front assist).
Il existe sans MFA avec MFA et MFA Color et Color 3D
 https://www.youtube.com/watch?v=xqN2xHAiNdY
(Dailleurs possibilité dajouter toutes ces options que je viens de citer sur golf 5, je suis en train de bosser sur le projet 😊)
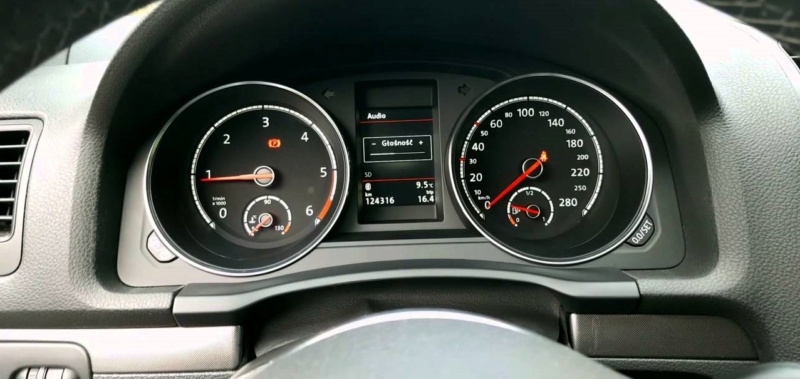
Le second et troisième style sont ceux qui nous intéressent le plus, à savoir : le balayage daiguille, le MFA, lindicateur de vitesse instantané, le passage aux aiguilles bleus (beaucoup plus jolie sur ces compteurs que ceux de la golf 5 à mon gout), le lcd qui ne sefface pas au soleil et laffichage de la vitesse dynamique.
Il existe sans MFA avec MFA et MFA Color et Color 3D
Sur cette photo cest un 3D Color MFA + aiguilles bleues
2. Changement du bloc ABS et/ou pontage de filPour pouvoir adapter ce compteur sur la Golf 5 en fonction de votre année, vous pouvez avoir plus ou moins de la chance.
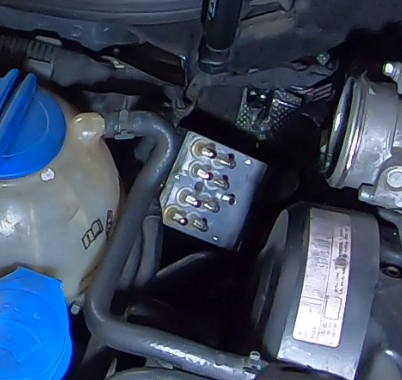
- Sur les Golfs 5 de 2004-Juin 2006avec lasr (bouton asr présent au niveau du cendrier) il faut changer la partie électrique du bloc abs (partie noir présente sur la photo et non la pompe).
La référence doit être bien inscrite sur le boitier électrique et non la pompe car ce nest pas la même.
BLOC ABS :1K0 907 379 AF (caddy, leon, skoda octavia...) seule référence à ce jour trouvé qui est compatible.
Disponible sur eBay pour un peu plus de 50euro et moins chère au Royaume Uni/Lituanie.

Pour le changement du bloc abs prévoir une purge du système abs.
Cela n'est pas obligatoire mais il va vous falloir 1L max pour remplir ce qui est tombé lorsqu'on va debrancher les durites et au passage autant faire une purge si elle n'a pas été fait il y a moins de 2ans
2 solutions soffrent à vous :
- Solution 1 : Sortir le bloc abs complet, déclipsé ensuite la partie électrique et mettre la nouvelle et revisser le système
- Solution 2 : pas trop accessible mais avec gain de temps, dévisser légèrement tous les vices, assez pour avoir du jeu dans le bloc pour ensuite déclipser directement la partie électrique du bloc abs dans la voiture et reclipser ensuite dedans le nouveau.
Dans ce tutoriel nous avions commencé par la solution numéro 1 mais vu que cela prenait beaucoup de temps nous avons utilisé la deuxième solution.
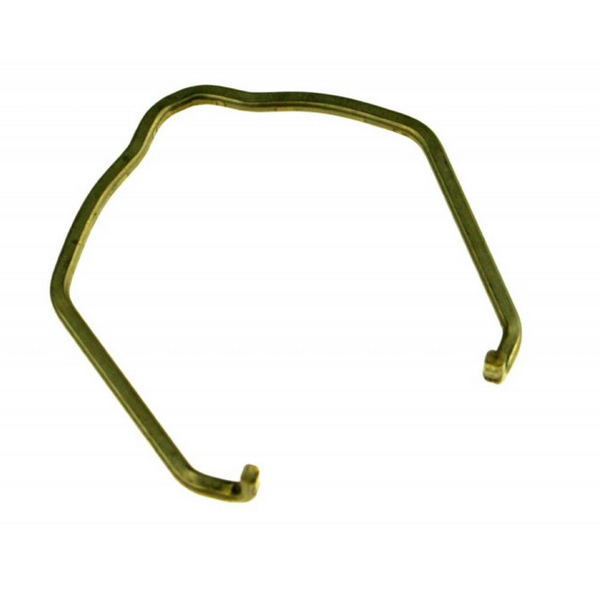
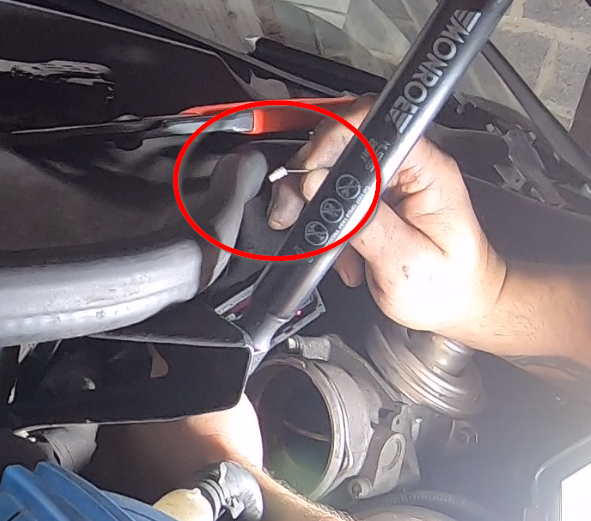
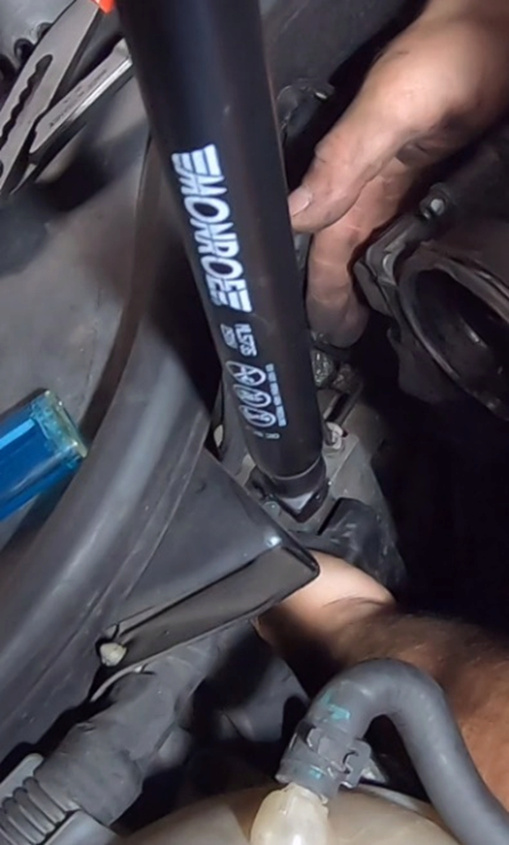
Première étape :1. Première étape, enlever la durite dair après la vanne egr, elle est retenue par 2 agrafes en fer à chaque extrémité, levé les pattes et tirer la durite vers lextérieur
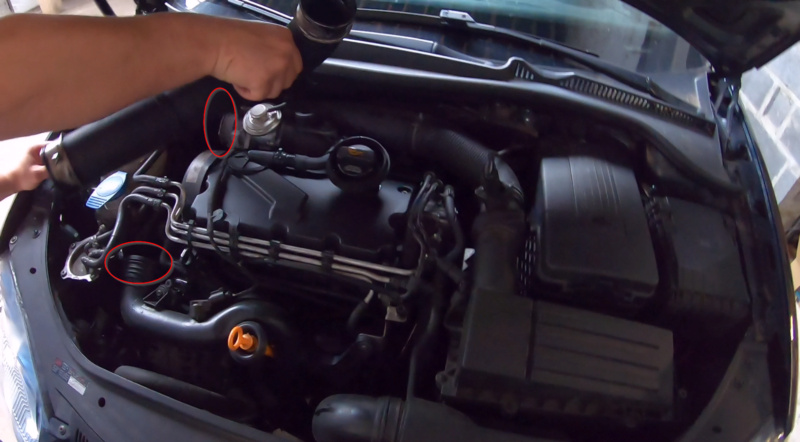
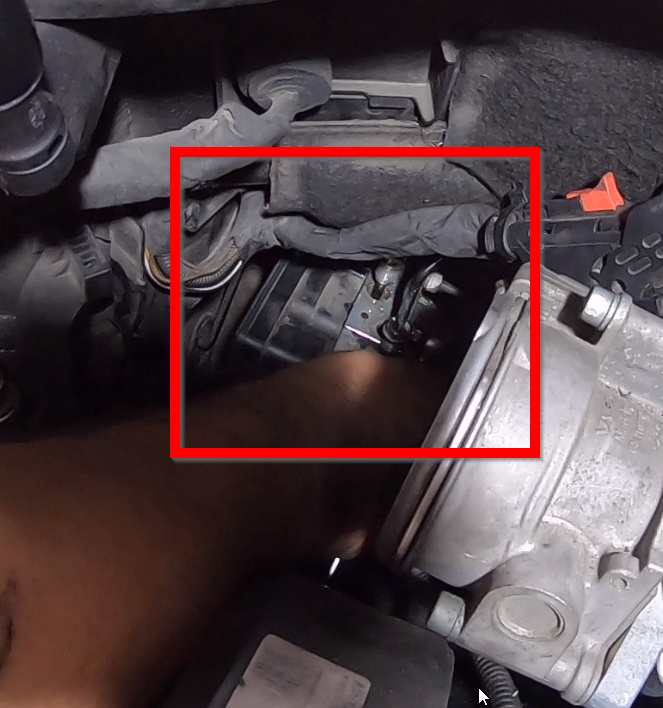
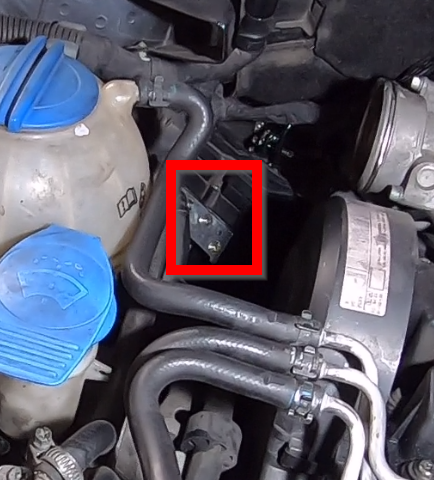
2. Accéder à la prise du bloc abs, déclipser celle-ci et débrancher la prise.
La prise et le bloc se situe derriere la vanne egr
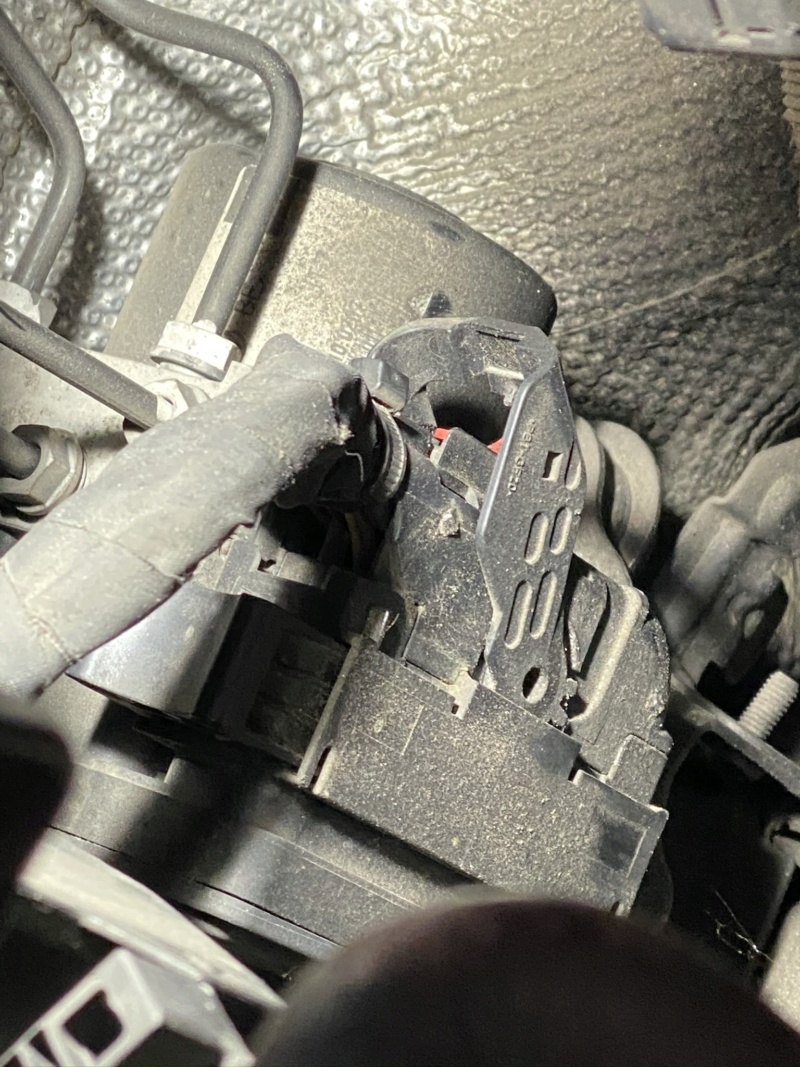

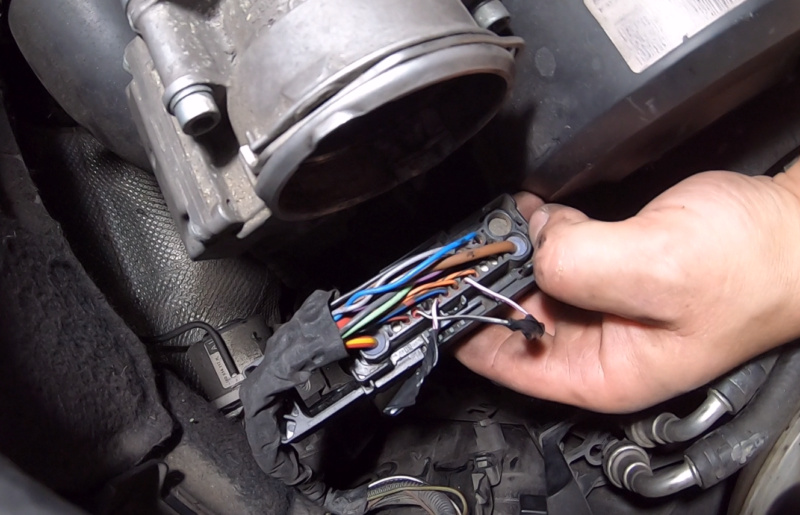
3. Déclipser le cache pour accéder à la prise
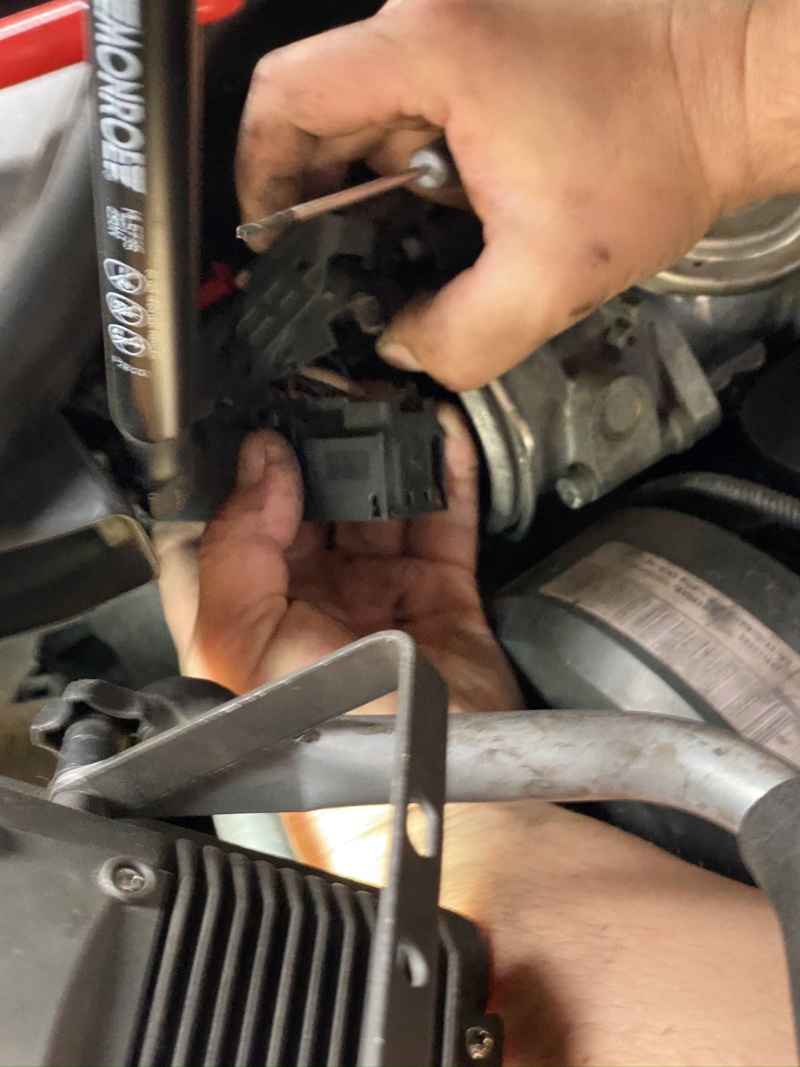
4. Repérer le câble blanc et violet et couper le au milieu (pin 22 vers 19).
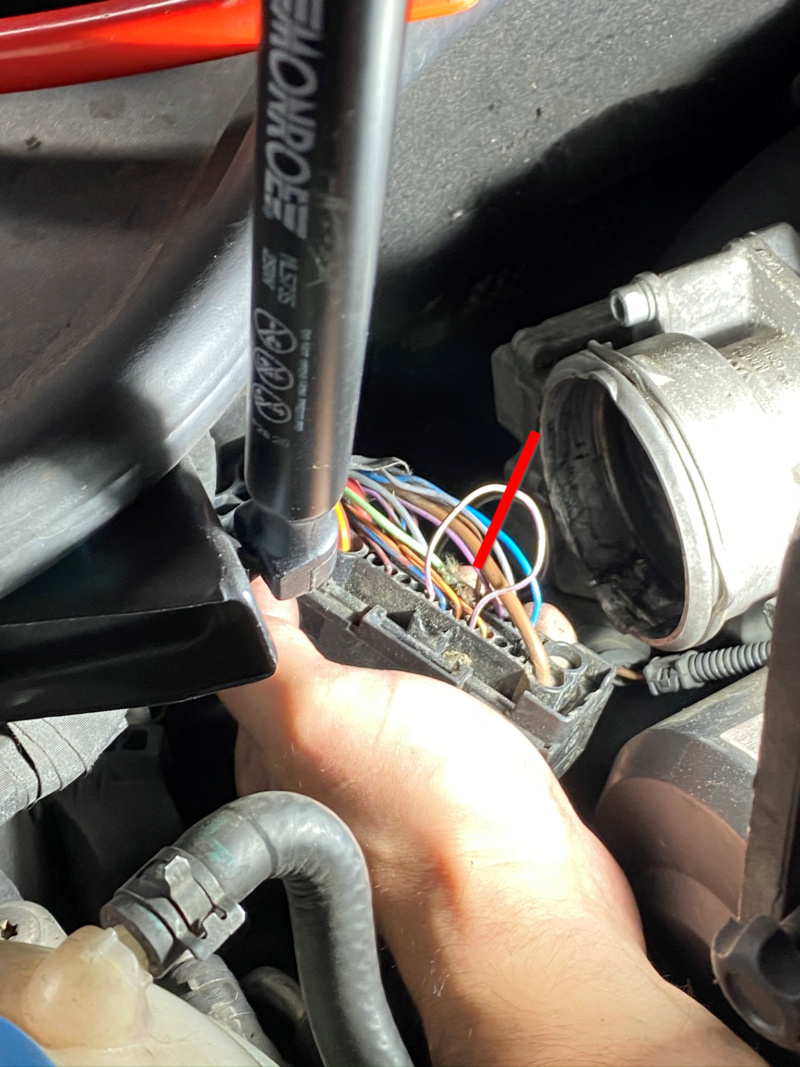
5. Avec une aiguille/cure-dent enlever le cache de la prise numéro 17
6. Effectuer un pontage de fil entre la prise 22 et 17 tout en laissant la prise 19 isolée
 ! Pour les personnes possédant lesp le tuto concernant la parti elec est finit !
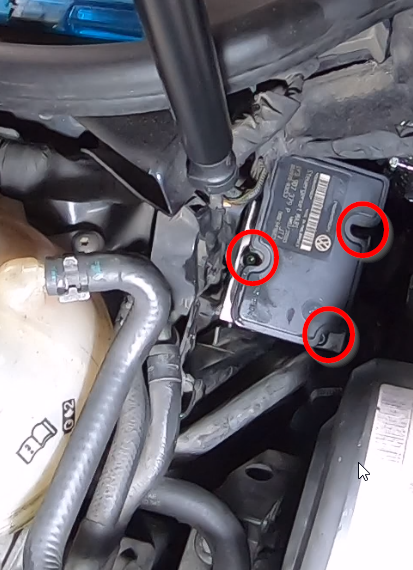
! Pour les personnes possédant lASR on continue !Seconde étape :1. Déclipser la partie électrique du nouveau bloc abs. Normalement il y a 3 visses en torx si il y en a pas temps mieux, puis ensuite le déboiter

Emplacement du bloc abs :
Pour une meilleure accessibilité décaler légèrement le bloc abs qui est retenu par des pattes de fixations
2. Débrancher les 6 tuyaux hydraulique à laide dune clé plate de 11, je vous conseille de prendre une clé à tuyau de frein afin de ne pas arrondir les visses
3. Une fois les tuyaux hydraulique débrancher sortir le bloc

4. Vu que le bloc entier ne sort pas on va directement le changer sur la voiture
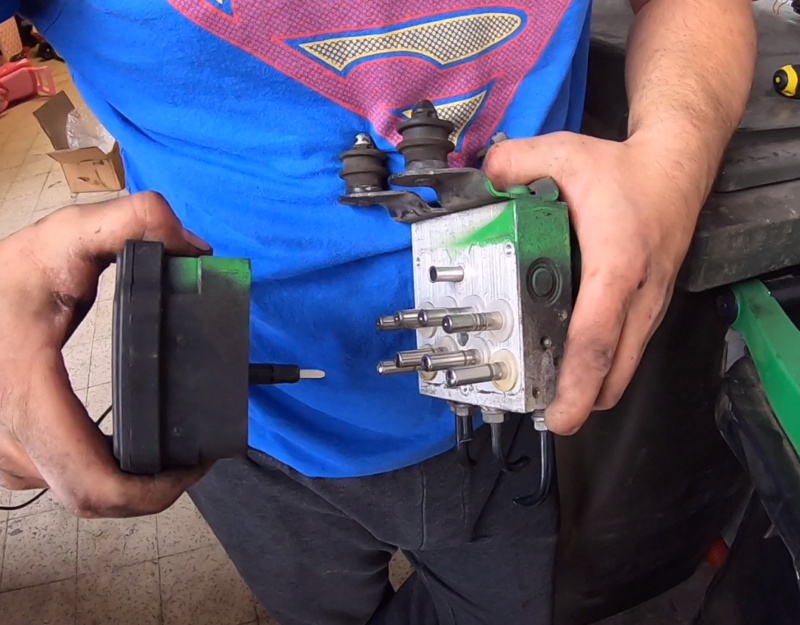
Le retourner pour accéder au 3 visses torx sur la façade
5. Une fois les vices torx enlever le bloc électrique sort comme le nouveau que lon a fait précédemment, en tirant dessus.
6. Puis on remet le nouveau bloc électrique en appuyant dessus (il ne se clipse pas donc on pousse jusquau fond)
Pour vérifier sil est bien au fond, le mettre de profil et vérifier sil y a un jour
Si comme moi il y en a un, en vissant ça va se refermer correctement.
Il reste plus quà remonter.
Pour information, le plus compliqué cest de remettre les tuyaux hydrauliques, cest chiant pour les mettre droites et que sa visse, sinon tout le reste ça va tout seul.
Une fois la cosse rebranchée, vérifier au vagcom que tout est ok, sinon effacez et refaites un diag.
Pour moi après 6 mois dutilisation aucun soucis, les freins fonctionnent tout comme le compteur.
CODAGE :Enfin pour pouvoir mettre ce compteur sur golf 5 il est nécessaire de coder le tout car celui-ci possède lantidémarrage (ex : si vous mettez le compteur sur golf 5, vous ne récupérerez pas le kilométrage et le codage de la puce entre le calculateur la clé et le compteur) la voiture de démarrera pas.
Oui car pour un démarrage il faut que les 3 pièces communes est le même codage : calculateur, compteur, clé, si un des 3 est manquant la voiture de pourra pas démarrer, du moins elle va démarrer 1sec et sarrêter aussi tôt. Si vous ne voulez pas tout recoder vous pouvez faire un immo-off cest-à-dire désactiver lantidémarrage mais pas très bien niveau sécurité si on vous vole la voiture (doù lintérêt dun antidémarrage)
Pour pouvoir coder le transpondeur de la clé, il faut aller chez un spécialiste (à part si vous voulez aller chez Volkswagen mais jai vu pas mal de retour sur le forum quils ne savaient pas faire le swap de compteur scirocco car pas compatible ou certains qui payent minimum 800 hors compteur).
Le spécialiste auquel jai pu prendre contact est le plus répandue sur le forum cest KaiserZeus vous pouvez prendre contact sur le forum ou via sa page Facebook :
https://www.facebook.com/CANLTSystems/Il vous donne et vous code un nouveau transpondeur, pour ce faire vous lui envoyer votre ancien compteur, votre clé actuelle (1 clé suffit) et votre nouveau compteur. Par contre vous devez compter une immobilisation du véhicule pendant x temps. Ou bien il peut voir pour désactiver lantidémarrage à distance temporairement le temps du codage.
Vous pouvez également si vous souhaitez lui demander dactiver le balayage des aiguilles, changer la couleur des aiguilles (en bleu ou autre couleur), activer la température dhuile sur lobd si le compteur le permet et si vous avez un compteur essence lui demander de le passer en diesel, pareille si vous achetez un compteur avec la graduation en Mph si vous le souhaitez le faire passer en km/h par contre à vous de fournir les graduations ou lui demander sil en a en stock.
ADAPTATION :Pour finir afin dadapter le compteur, il faut un adaptateur 36 pins vers 32. En effet sur les générations scirocco et au-dessus de golf 5 ce nest plus le gros bloc (prise noir) qui est derrière le compteur qui vient senclencher sur le compteur un petit bloc.
Pas de panique il existe un câblage pour permettre ladaptation.

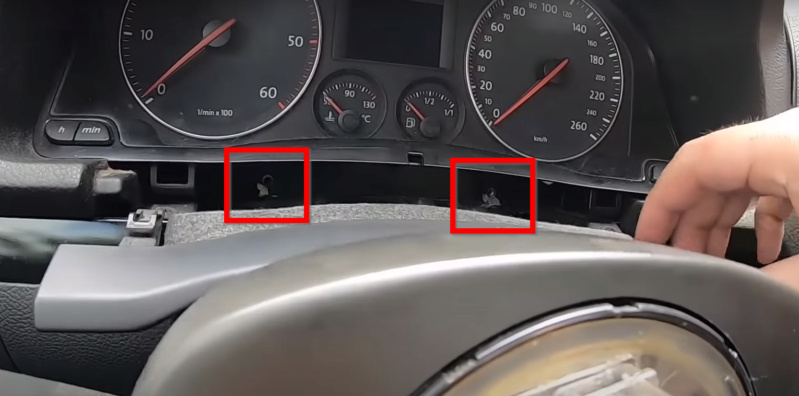
Après avoir acheté ladaptateur il faut dévisser la grosse prise derrière, coté tableau de bord, brancher ladaptateur et faire passer le câblage dans le trou, ramener ensuite le compteur au fer et à mesure et visser les 2 visses présente sous la baguette en dessous du compteur.
Déclipser les agrafes (attention elles sont fragiles)
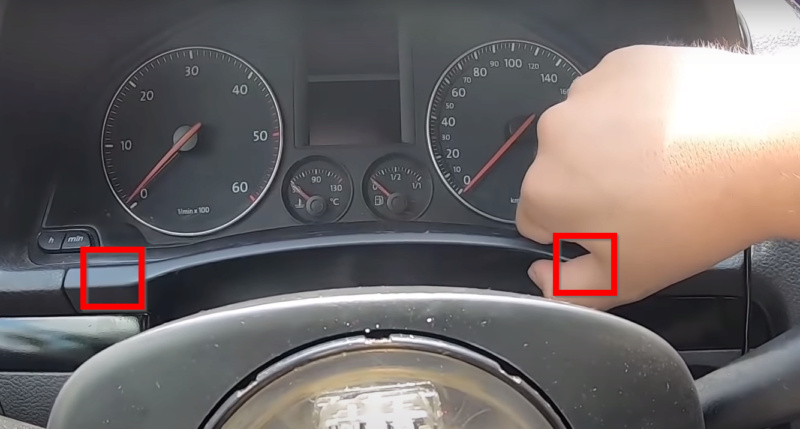
Et dévisser les 2 visses qui tiennent (attention également à pas les faire tomber)
 RÉSULTAT FINAL :